
Animated Sliding Tabs with React and Tailwind
Add some flair to a simple tab solution by adding an animated bottom border.
In a recent post, I explored building a simple tab system in React. (Here’s the playground.)
That’s a good start, but you’re likely going to want to add some flair to make the tabs really shine. While there are a number of fancy things you could pursue, here we’re going to explore replacing the active border with one that is animated to slide from the previously-active tab to the newly-active tab.

Let’s do it!
Note that I’m stepping through the process here. But you’re welcome to jump down to the bottom for the full solution, along with a playground.
The Starting Code
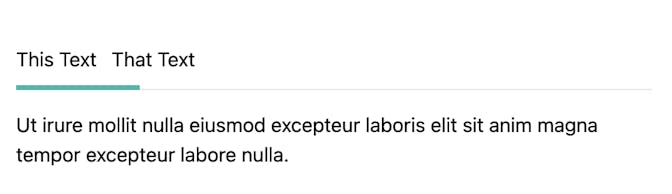
We’ll start from the previous example, which looked like this:
import { useState } from "react";

const tabsData = [
  {
    label: "This Text",
    content:
      "Ut irure mollit nulla eiusmod excepteur laboris elit sit anim magna tempor excepteur labore nulla.",
  },
  {
    label: "That Text",
    content:
      "Fugiat dolor et quis in incididunt aute. Ullamco voluptate consectetur dolor officia sunt est dolor sint.",
  },
];

export function Tabs() {
  const [activeTabIndex, setActiveTabIndex] = useState(0);

  return (
    <div>
      <div className="flex space-x-3 border-b">
        {/* Loop through tab data and render button for each. */}
        {tabsData.map((tab, idx) => {
          return (
            <button
              key={idx}
              className={`py-2 border-b-4 transition-colors duration-300 ${
                idx === activeTabIndex
                  ? "border-teal-500"
                  : "border-transparent hover:border-gray-200"
              }`}
              // Change the active tab on click.
              onClick={() => setActiveTabIndex(idx)}>
              {tab.label}
            </button>
          );
        })}
      </div>
      {/* Show active tab content. */}
      <div className="py-4">
        <p>{tabsData[activeTabIndex].content}</p>
      </div>
    </div>
  );
}
This is a simple tab system, which shows the active state with a teal bottom border. Now let’s look at animating that border.
Make Space for the Underline
We’re going to animate the border by … hiding the border. This may seem goofy, but our underline is going to become a detached, absolutely-positioned element.
Let’s adjust our markup a bit.
<div>
  <div className="relative">
    <div className="flex space-x-3 border-b">
      {tabsData.map((tab, idx) => {
        return (
          <button
            key={idx}
            className="pt-2 pb-3"
            onClick={() => setActiveTabIndex(idx)}>
            {tab.label}
          </button>
        );
      })}
    </div>
    <span className="absolute bottom-0 block h-1 bg-teal-500 transition-all duration-300" />
  </div>
  <div className="py-4">
    <p>{tabsData[activeTabIndex].content}</p>
  </div>
</div>
Here are the changes to note:
- The tabs are now wrapped in another
<div>with arelativeclass. Note that the content area falls outside of this div. This is important. - The tab buttons no longer have a conditional class to set their border color. Instead, they are leaving a little extra space at the bottom (
pb-3sets the bottom padding). - Within that relative wrapping
<div>there is a<span>element (its last child). This is going to be our underline component.
If you’re following along, you’ve probably noticed that the underline disappeared. This is because the new underline element has a height, but no width. Let’s set that up next.
Underline Style with useState
Both the position and width of the underline is subject to the content of the tab buttons. We’ll use the state hook along with the effect hook to manage these values.
Let’s start with just the state. First, add two new state objects, one for the left value and the other for the width.
export function Tabs() {
  const [tabUnderlineWidth, setTabUnderlineWidth] = useState(0);
  const [tabUnderlineLeft, setTabUnderlineLeft] = useState(0);
	// ...
And then we can use these values to set the style in our <span> underline element.
<span
  className="absolute bottom-0 block h-1 bg-teal-500 transition-all duration-300"
  style={{ left: tabUnderlineLeft, width: tabUnderlineWidth }}
/>
But you still won’t see an underline on the screen. That’s because we still haven’t properly set the width or left.
The argument passed to useState is the initial value. We’re setting both the width and left values to 0 at first. Just to ensure it’s working, you could set the tabUnderlineWidth value to something like 100 and see that the underline is in the proper position.
Animate Underline
Now let’s bring this thing to life!
Tab Button Reference
The last missing piece is that we need a way to be able to access the tab buttons’ HTML elements to determine their width and position. We can do this with the useRef hook.
But we also don’t know how many refs we need. Therefore, we’re storing an array of refs within the ref.
export function Tabs() {
  // useState code ...

  const tabsRef = useRef([]);

  // other code ...
}
And then we attach each tab button to that ref.
{
  tabsData.map((tab, idx) => {
    return (
      <button
        key={idx}
        // Add button element to tabsRef array
        ref={(el) => (tabsRef.current[idx] = el)}
        className="pt-2 pb-3"
        onClick={() => setActiveTabIndex(idx)}>
        {tab.label}
      </button>
    );
  });
}
Dynamically Set Width and Left
Now we can use the useEffect hook to identify the active tab button’s width and position.
export function Tabs() {
  // useState and useRef hook code ...

  useEffect(() => {
    function setTabPosition() {
      const currentTab = tabsRef.current[activeTabIndex];
      setTabUnderlineLeft(currentTab?.offsetLeft ?? 0);
      setTabUnderlineWidth(currentTab?.clientWidth ?? 0);
    }

    setTabPosition();
    window.addEventListener("resize", setTabPosition);

    return () => window.removeEventListener("resize", setTabPosition);
  }, [activeTabIndex]);

  return; // markup here ...
}A few important things to note about this code:
We’re using
activeTabIndexas a dependency, which means that whenever the active tab changes, this effect will be run.This is also accounting for the window being resized, which is a fancy addition. It won’t really affect this small example, but may help as you adjust other styles and functionality.
Demo / Playground
Here’s the full example in a Stackblitz playground.
Full Code
Here’s the entire code snippet.
import { useEffect, useRef, useState } from "react";

const tabsData = [
  {
    label: "This Text",
    content:
      "Ut irure mollit nulla eiusmod excepteur laboris elit sit anim magna tempor excepteur labore nulla.",
  },
  {
    label: "That Text",
    content:
      "Fugiat dolor et quis in incididunt aute. Ullamco voluptate consectetur dolor officia sunt est dolor sint.",
  },
];

export function Tabs() {
  const [activeTabIndex, setActiveTabIndex] = useState(0);
  const [tabUnderlineWidth, setTabUnderlineWidth] = useState(0);
  const [tabUnderlineLeft, setTabUnderlineLeft] = useState(0);

  const tabsRef = useRef([]);

  useEffect(() => {
    function setTabPosition() {
      const currentTab = tabsRef.current[activeTabIndex];
      console.log(currentTab?.offsetLeft, currentTab?.clientWidth);
      setTabUnderlineLeft(currentTab?.offsetLeft ?? 0);
      setTabUnderlineWidth(currentTab?.clientWidth ?? 0);
    }

    setTabPosition();
    window.addEventListener("resize", setTabPosition);

    return () => window.removeEventListener("resize", setTabPosition);
  }, [activeTabIndex]);

  return (
    <div>
      <div className="relative">
        <div className="flex space-x-3 border-b">
          {tabsData.map((tab, idx) => {
            return (
              <button
                key={idx}
                ref={(el) => (tabsRef.current[idx] = el)}
                className="pt-2 pb-3"
                onClick={() => setActiveTabIndex(idx)}>
                {tab.label}
              </button>
            );
          })}
        </div>
        <span
          className="absolute bottom-0 block h-1 bg-teal-500 transition-all duration-300"
          style={{ left: tabUnderlineLeft, width: tabUnderlineWidth }}
        />
      </div>
      <div className="py-4">
        <p>{tabsData[activeTabIndex].content}</p>
      </div>
    </div>
  );
}Keep Reading

Simple Content Tab with React and Tailwind
The foundation for a tab system begins with a state hook, triggered by clicks on tab elements. View the code snippet and use the playground to see it in action.

Use a Class Map to Set Dynamic Styles
Components often need to use styling based on property combinations. There are a number of ways to solve this, but only one I’ve found to be the cleanest.
How to Add SVG Icons to a React Project
Vector icons have become an essential part of nearly every web project. Stay consistent and organized when adding icons to a React project.